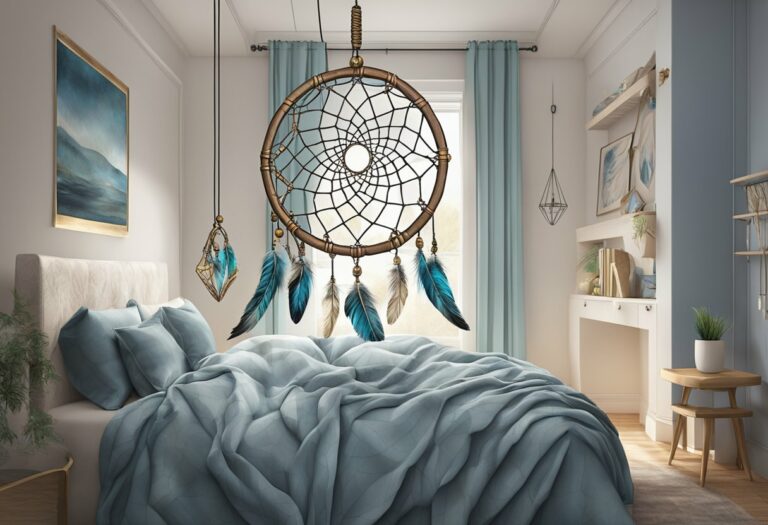
Craft the Perfect Dreamcatcher Wall Hanging
Elevate your home decor with a touch of boho-chic by creating your own dreamcatcher wall hanging. Not only will this versatile and charming piece add a unique element to any room, but it will also serve as a symbol of protection and positive energy.
In this article, we will provide a step-by-step guide to help you craft your dreamcatcher using simple crochet techniques and basic materials like cotton yarn and a crochet hook. With easy-to-follow instructions and useful tips, you can customize your dreamcatcher to match your personal style and color scheme.
From selecting the right yarn and hoop size to creating intricate patterns and adding decorative elements like felt feathers, this article will equip you with all the information necessary to create a stunning dreamcatcher wall hanging that will become the focal point of your space.
Unleash your creativity and embark on this crafty journey to fashion the perfect dreamcatcher wall hanging, reflecting your individuality and enhancing the ambiance of your home.
Materials and Tools Needed
To begin crafting the perfect dreamcatcher wall hanging, gather the necessary materials and tools. You will need:
- 15m of 100% cotton DK yarn in white
- A 3mm crochet hook
- A 10cm hoop
- Colored felt
- A yarn needle for sewing ends
These materials and tools are essential for creating a beautiful and sturdy dreamcatcher. The 100% cotton DK yarn in white will provide a soft and delicate texture, while the crochet hook will allow for precise and intricate stitching. The 10cm hoop will serve as the base for the dreamcatcher, providing structure and stability. Colored felt can be used to create decorative elements, such as feathers, to enhance the overall design. Lastly, the yarn needle will be useful for neatly sewing in the loose ends, ensuring a polished and professional finish.
With these materials and tools at hand, you are ready to embark on the journey of creating your own dreamcatcher wall hanging.
Measurements and Abbreviations
Discussing the measurements and abbreviations is essential for understanding the crafting process of the dreamcatcher wall hanging.
The finished crochet dreamcatcher has a diameter of 10cm (4″), while the fringe measures approximately 12cm (4¾) long.
It is important to note that tension is not crucial for this project, so you can aim for a finish that you are satisfied with.
The pattern is written in UK terminology, but it can easily be converted to US terms using the provided guide.
Additionally, a full list of abbreviations can be found in the abbreviations and conversions guide.
Step-by-step Instructions
The step-by-step instructions for creating the dreamcatcher wall hanging are as follows.
First, create a ring by chaining 8 and slip stitching to the first chain.
Then, chain 2 and make 15 double crochets in the ring, joining into the top of the second chain with a slip stitch.
Next, chain 2 and chain 3, *skip 1 stitch, make 1 double crochet in the next stitch, chain 3; repeat from * until the end of the round, finishing with skipping 1 stitch and joining into the top of the second chain with a slip stitch.
After that, slip stitch into the first chain-3 space, chain 2, and make 3 double crochets in the same space. Make 4 double crochets in each of the next 7 chain-3 spaces, joining into the top of the second chain with a slip stitch.
Now, chain 2 and chain 6, *skip 3 stitches, make 1 double crochet in the next stitch, chain 6; repeat from * until the end of the round, finishing with skipping 3 stitches and joining into the top of the second chain with a slip stitch.
Slip stitch into the first chain-6 space, chain 2, and make 3 double crochets in the same space. Chain 2, slip stitch around a 10 cm hoop, chain 2, make 4 double crochets in the same chain-6 space, chain 2, slip stitch around the hoop, chain 2, *(make 4 double crochets, chain 2, slip stitch around the hoop, chain 2, make 4 double crochets, chain 2, slip stitch around the hoop, chain 2) all in the next chain-6 space; repeat from * until the end of the round, joining into the top of the second chain with a slip stitch.
Break the yarn, fasten off, and sew in the ends.
For finishing, cut 12 pieces of yarn, each measuring 25 cm, and tie each one in half around the hoop to form the fringe.
Cut out five feathers from colored felt using the feather template and attach them using yarn over the fringe.
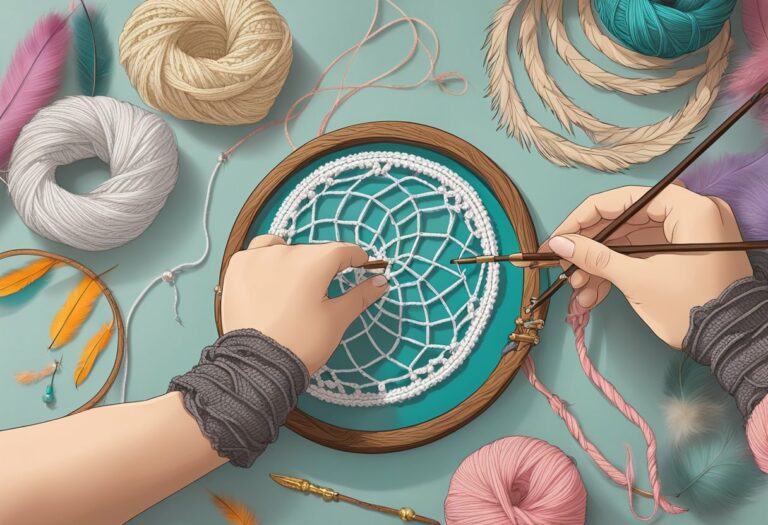
Creating the Crochet Dreamcatcher
Now let’s delve into the process of crafting the crochet dreamcatcher. To create this intricate piece, you will need:
- 15m of any 100% cotton DK yarn in white
- A 3mm crochet hook
- A 10cm hoop
- Colored felt
- A yarn needle for sewing ends
The finished crochet dreamcatcher measures 10cm in diameter, with fringe approximately 12cm long. Tension is not crucial for this project, so aim for a finish that satisfies you. The pattern is written in UK terminology, but it can be easily converted to US terms using a conversion guide.
Follow the step-by-step instructions outlined below to complete your crochet dreamcatcher:
Step 1:
Create a ring by chaining 8 stitches and joining them with a slip stitch.
Step 2:
Chain 2, then make 15 double crochet stitches in the ring. Join into the top of the 2nd chain from the start with a slip stitch.
Step 3:
Chain 2, chain 3, *skip 1 stitch, make 1 double crochet in the next stitch, chain 3; repeat from * to the end of the round. Finish with skipping 1 stitch and joining into the top of the 2nd chain from the start with a slip stitch. This will result in 8 chain-3 spaces.
Step 4:
Slip stitch into the first chain-3 space, chain 2, make 3 double crochet stitches in the same chain-3 space, and then make 4 double crochet stitches in each of the next 7 chain-3 spaces. Join into the top of the 2nd chain from the start with a slip stitch. You should have 32 double crochet stitches.
Step 5:
Chain 2, chain 6, *skip 3 stitches, make 1 double crochet in the next stitch, chain 6; repeat from * to the end of the round. Finish with skipping 3 stitches and joining into the top of the 2nd chain from the start with a slip stitch. This will result in 8 chain-6 spaces.
Step 6:
Slip stitch into the first chain-6 space, chain 2, make 3 double crochet stitches in the same chain-6 space, chain 2, slip stitch around the 10cm hoop, chain 2, make 4 double crochet stitches in the same chain-6 space, chain 2, slip stitch around the hoop again, chain 2, *(make 4 double crochet stitches, chain 2, slip stitch around the hoop, chain 2, make 4 double crochet stitches, chain 2, slip stitch around the hoop, chain 2) all in the next chain-6 space; repeat from * to the end of the round. Join into the top of the 2nd chain from the start with a slip stitch. Break the yarn, fasten off, and sew in the ends.
To finish the dreamcatcher, cut 12 pieces of yarn measuring 25cm each and tie each one in half around the hoop to form the fringe. Cut out five felt feathers using the provided template and attach them with yarn over the fringe. Lastly, make an 80cm chain as a tie and attach it to the top of the dreamcatcher for hanging.
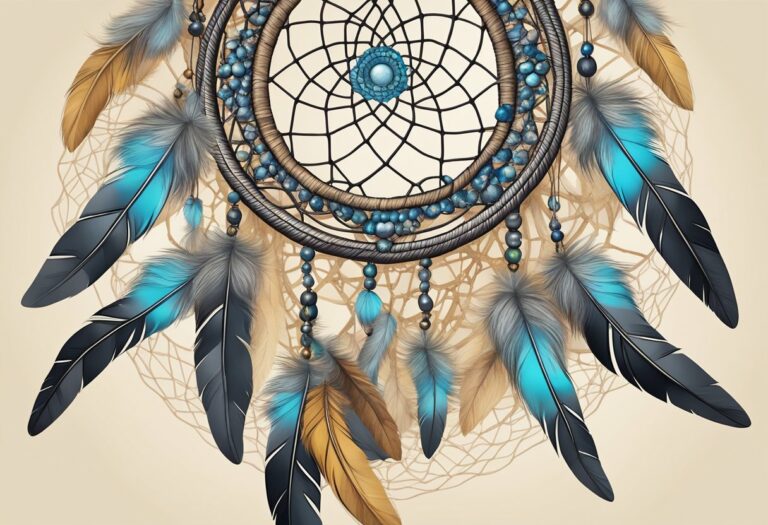
Adding the Fringe and Feathers
To incorporate the final touches into the crochet dreamcatcher, proceed with adding the fringe and attaching the felt feathers.
Begin by cutting 12 pieces of yarn, each measuring 25cm (9⅞″), and tie each one in half around the hoop to form the fringe. This will give the dreamcatcher a beautiful and whimsical appearance.
Next, use the feather template to cut out five felt feathers. Attach these feathers to the dreamcatcher by tying them over the fringe with yarn. This will add a touch of color and texture to the overall design.
Finishing Touches and Hanging the Dreamcatcher
To complete the dreamcatcher wall hanging, it is important to focus on the finishing touches and the method of hanging. Here are three key steps to consider:
- Trim and Fringe: Cut 12 pieces of yarn, each measuring 25cm (9⅞″), and tie each one in half around the hoop to create the fringe. This will add texture and movement to your dreamcatcher.
- Attach Feathers: Using the provided feather template, cut out five felt feathers. Attach these feathers to the fringe using yarn, spacing them out evenly. The feathers will add a decorative element and enhance the overall aesthetic of the dreamcatcher.
- Hanging the Dreamcatcher: Create an 80cm (31½″) chain as a tie, and attach it to the top of the dreamcatcher. This chain will serve as a means to hang the dreamcatcher securely on the wall, allowing it to be prominently displayed and admired.
Conclusion
In conclusion, crafting your own dreamcatcher wall hanging is a creative and fulfilling project that allows you to add a touch of boho-chic to your home decor.
By following the step-by-step instructions and utilizing basic materials and crochet techniques, you can create a stunning and personalized piece that not only enhances the ambiance of your space but also serves as a symbol of protection and positive energy.
Let your creativity soar and enjoy the process of creating the perfect dreamcatcher that reflects your individuality.