
How to Respectfully Make a Dreamcatcher: A Step-by-Step Guide
If you’re interested in making a dreamcatcher, it’s important to approach the process with respect and care. Dreamcatchers are sacred objects that have been used for generations by Indigenous communities to filter out bad dreams and allow good ones to pass through. By following a few simple steps, you can create a beautiful dreamcatcher while also honoring the cultural significance of this traditional craft.

To begin, it’s important to understand the history and meaning behind dreamcatchers. Dreamcatchers are believed to have originated with the Ojibwe people, who used them to protect newborns from bad dreams. Today, dreamcatchers are often used in many Indigenous cultures as a symbol of protection and connection to the spiritual world. When making a dreamcatcher, it’s important to approach the process with reverence and respect for the cultural significance of this tradition.
Once you have a basic understanding of the history and meaning behind dreamcatchers, you can begin gathering the materials you’ll need to create your own. This may include a metal or wooden hoop, string or sinew, feathers, and beads. You’ll also need to choose a design for your dreamcatcher and prepare the hoop by wrapping it with string or ribbon. With a little patience and practice, you can create a beautiful dreamcatcher that honors the cultural significance of this traditional craft.
Key Takeaways
- Understanding the history and meaning behind dreamcatchers is an important part of respectfully making your own.
- Gathering the right materials and choosing a design that feels meaningful to you can help you create a beautiful dreamcatcher.
- Preparing the hoop, weaving the web, and adding feathers and beads are all important steps in the dreamcatcher-making process.
Understanding Dreamcatchers

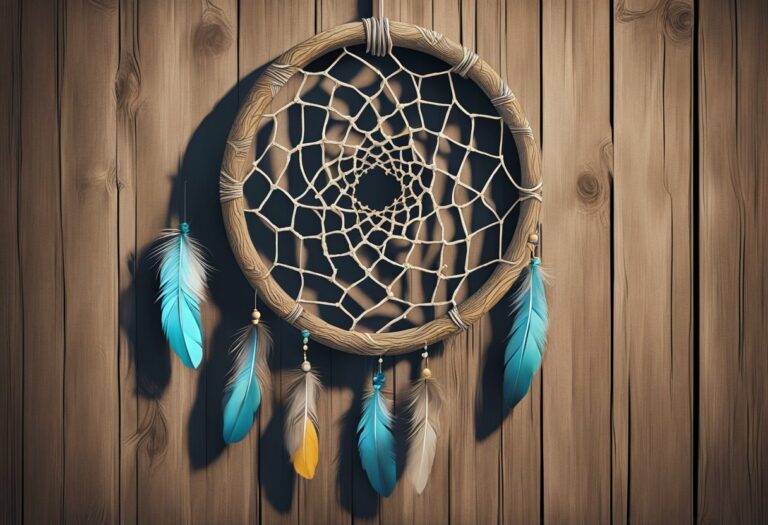
Dreamcatchers are a traditional Native American craft that have become popular in modern times. They are a symbol of protection and are believed to catch good dreams while letting bad dreams pass through. The Ojibwe people, also known as the Chippewa, are credited with the creation of dreamcatchers. According to their legend, a spider woman helped protect a baby from bad dreams by weaving a web over its crib.
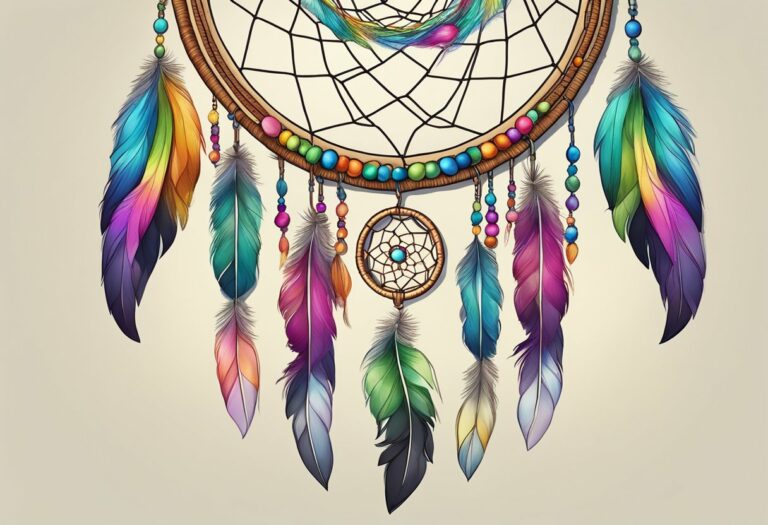
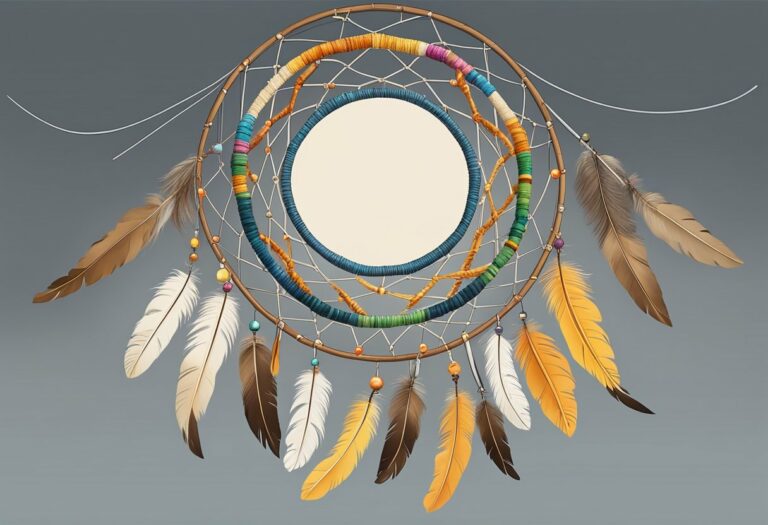
Dreamcatchers typically consist of a woven web in the center, with feathers and beads attached to the bottom. The web is usually made of sinew or string and is woven in a circular pattern. The feathers and beads are often chosen for their spiritual significance. For example, eagle feathers are considered sacred and are believed to carry prayers to the creator.
It is important to understand the cultural significance of dreamcatchers and to make them with respect and knowledge. Dreamcatchers are not just a trendy decoration, but a symbol of Native American culture and spirituality. The pan-Indian movement in the 1960s and 1970s helped spread the use of dreamcatchers beyond the Ojibwe people.
When making a dreamcatcher, it is important to use appropriate materials and techniques. Traditional dreamcatchers are made with natural materials such as willow branches, sinew, and feathers. When using feathers, it is important to use only legally obtained feathers and to avoid using eagle feathers, which are protected by law.
Overall, understanding the history and cultural significance of dreamcatchers is essential to making them with respect and knowledge. By using appropriate materials and techniques, you can create a beautiful and meaningful dreamcatcher that honors Native American traditions.
Materials Needed

To respectfully make a dreamcatcher, you will need to gather a few materials. Traditionally, dreamcatchers were made using natural materials such as willow, sinew, and feathers. However, you can use a variety of materials to make a dreamcatcher that suits your style and preferences.
Here are some of the materials you might need:
Hoop
The hoop is the base of your dreamcatcher. You can use a metal hoop, wooden hoop, or even an embroidery hoop. The size of your hoop will determine the size of your dreamcatcher. A good starting size is 5 to 8 inches in diameter, but you can go bigger or smaller depending on your preference.
String or Yarn
You will need string or yarn to create the webbing of your dreamcatcher. You can use a variety of materials such as leather, suede lace, hemp, nylon, or silk thread. Choose a material that matches the look and feel you want for your dreamcatcher.
Feathers
Feathers are a traditional element of dreamcatchers. You can use natural feathers or artificial ones to decorate your dreamcatcher. Choose feathers that are appropriate for the size of your dreamcatcher and the look you want to achieve.
Beads
Beads can be used to decorate the strings of your dreamcatcher or to add weight to the feathers. You can use a variety of beads such as wooden, glass, or plastic beads. Choose beads that match the color scheme of your dreamcatcher.
Glue
You will need glue to secure the strings and feathers to your dreamcatcher. You can use hot glue or craft glue, depending on your preference.
Other Materials
Other materials you might want to consider include sinew, strips of fabric, shells, artificial sinew, and artificial flowers. These materials can be used to add texture and interest to your dreamcatcher.
Choosing the Right Design

When it comes to designing your dreamcatcher, there are a few things to consider. First, you want to decide if you want to create a traditional dreamcatcher or something more modern. Traditional dreamcatchers typically have a circular hoop and are adorned with feathers and beads. However, modern dreamcatchers can be made with a variety of materials and designs.
If you decide to go with a traditional dreamcatcher, there are many options for embellishments. Feathers are a popular choice and can be found in a variety of colors and sizes. Beads can also be added to the webbing or the strings hanging from the hoop. Gemstones and charms can also be added for a personal touch.
If you decide to create a more modern dreamcatcher, you can get creative with your design. You can use different shapes for the hoop, such as a heart or star. You can also experiment with different materials, such as ribbon or lace.
No matter what design you choose, it’s important to personalize your dreamcatcher. You can add your favorite colors, symbols, or even your name. This will make your dreamcatcher unique and special to you.
In conclusion, choosing the right design for your dreamcatcher is an important step in creating a beautiful and respectful piece. Whether you choose to go with a traditional or modern design, make sure to personalize it and make it your own.
Preparing the Hoop
https://www.youtube.com/watch?v=EUulfZU3AQY&embed=true
The first step in making a respectful dreamcatcher is to prepare the hoop. Traditionally, the round hoops of a dreamcatcher were made from willow or sinew, but you can use any type of wood or metal hoop, which can be purchased easily and cheaply at a craft store. While they can be any size, a good starting size is 5 to 8 inches in diameter.
Once you have your hoop, you may want to decorate it before beginning to weave the web. You can wrap it in leather, ribbon, or other materials, or you can paint or stain it. Keep in mind that any decorations should be respectful and appropriate. Avoid using sacred symbols or images from cultures that are not your own without permission and understanding of their significance.
Before you begin weaving the web, make sure your hoop is secure and sturdy. You can reinforce it by wrapping it with additional string or ribbon. This will ensure that your dreamcatcher lasts and functions properly.
Overall, preparing the hoop is an important step in making a respectful dreamcatcher. By choosing an appropriate size and material and decorating it in a respectful way, you are honoring the tradition of dreamcatcher making and creating a beautiful and meaningful object.
Weaving the Web
To start weaving the web of your dreamcatcher, you will need to create a loop using a flexible material such as willow branches or a metal hoop. Once you have your loop, you can start weaving the web by tying a knot at the top of the loop and then creating a series of loops around the perimeter of the loop.
As you weave the web, you will need to create a series of knots to secure the loops in place. One common knot used in dreamcatcher weaving is the half-hitch knot. To create a half-hitch knot, simply loop the string around the loop and then pull the string through the loop to create a knot.
To create the intricate web pattern of your dreamcatcher, you will need to create a series of loops and knots that form a ladder-like pattern. As you weave the web, be sure to keep the tension of the string consistent to ensure that the web is tight and secure.
Once you have completed weaving the web, you can add decorative touches to your dreamcatcher such as feathers, beads, and other embellishments. Keep in mind that it is important to be respectful of the cultural significance of the dreamcatcher and to use materials that are culturally appropriate.
By following these steps, you can create a beautiful and respectful dreamcatcher that is both aesthetically pleasing and culturally significant.
Adding the Feathers and Beads
Now that you have completed the webbing of your dreamcatcher, it’s time to add the feathers and beads. This is the part where you can get creative and add your own personal touch to the dreamcatcher.
First, select the feathers you want to use. It’s important to use feathers that are ethically sourced and legal to possess. You can purchase feathers from craft stores or online, or you can collect feathers you find in nature. Once you have your feathers, trim them to the desired length using scissors.
Next, choose the beads you want to use. Beads come in various shapes, sizes, and colors, so pick ones that complement the overall look of your dreamcatcher. You can use a single bead or multiple beads on each feather.
To attach the feathers and beads, tie a knot at the bottom of each feather using a strong thread. Then, thread the bead onto the same thread and tie another knot at the end of the bead to secure it in place. Repeat this process for each feather and bead combination.
Once you have attached all the feathers and beads, you can glue them onto the dreamcatcher. Apply a small amount of glue to the knot at the bottom of each feather and press it onto the webbing of the dreamcatcher. Hold it in place for a few seconds until the glue dries.
Remember to space out the feathers and beads evenly around the dreamcatcher to ensure a balanced look. You can also add other decorations such as ribbons or shells to make the dreamcatcher even more unique.
By following these steps, you can add feathers and beads to your dreamcatcher in a respectful and creative way.
Final Touches
Once you have completed your DIY dreamcatcher, it’s time to add the final touches to make it look its best. The final touches are essential to enhance the overall aesthetics of your dreamcatcher.
Inspect Your Dreamcatcher
Inspect your dreamcatcher for any loose threads, glue, or imperfections. Make any necessary adjustments to ensure your dreamcatcher looks its best. Attention to detail in this step is crucial to ensure that your dreamcatcher looks neat and tidy.
Personalize Your Dreamcatcher
You can personalize your dreamcatcher by adding decorations that reflect your personality or the room you plan to hang it in. Consider adding feathers, beads, or ribbons to your dreamcatcher to make it unique. You can also incorporate colors that complement the room where you plan to hang your dreamcatcher.
Decorating Your Dreamcatcher
Decorating your dreamcatcher is a fun way to add a personal touch to your DIY craft. You can use natural materials such as feathers, shells, and stones to decorate your dreamcatcher. You can also use fabric, yarn, or ribbon to add texture and color to your dreamcatcher.
Display Your Dreamcatcher
Once you have completed your dreamcatcher, it’s time to display it. You can hang your dreamcatcher on a wall or from the ceiling using a hook or nail. You can also place your dreamcatcher on a shelf or table as a decorative piece.
In conclusion, the final touches are essential to enhance the overall aesthetics of your DIY dreamcatcher. Personalize your dreamcatcher by adding decorations that reflect your personality or the room where you plan to hang it. Decorating your dreamcatcher is a fun way to add a personal touch to your DIY craft. Display your dreamcatcher in a prominent place to showcase your creativity and hard work.
Hanging Your Dreamcatcher
Once you have completed your dreamcatcher, it’s time to hang it up. The placement of your dreamcatcher is important, as it will affect the energy it attracts.
First, choose a location that is easily visible and accessible. You want to be able to see your dreamcatcher from your bed, so hanging it above your bed is a great option.
When hanging your dreamcatcher, use a strong and sturdy material for the hanging loop. This will ensure that it stays securely in place. You can use anything from leather cord to a metal hook, as long as it can support the weight of your dreamcatcher.
It’s important to note that dreamcatchers are not recommended for infants or young children, as they can pose a choking hazard. However, for adults, hanging a dreamcatcher can bring joy and a sense of connection to the spiritual world.
Overall, hanging your dreamcatcher should be a simple and straightforward process. Just remember to choose a visible location, use a strong hanging loop, and keep it out of reach of infants and young children.
Video Tutorial
If you prefer to learn by watching someone else do it, there are plenty of video tutorials available online. One such tutorial is this one on YouTube. The video is just over 10 minutes long and goes through the process of making a dreamcatcher step-by-step.
The video starts with a list of materials you will need, which includes a hoop, string, beads, and feathers. The host then shows you how to wrap the hoop with string and create the webbing using a simple knotting technique. Along the way, she offers tips and tricks to make the process easier.
One thing to keep in mind when following a video tutorial is that you may need to pause and rewind the video to catch everything. It can also be helpful to take notes or make a list of the steps as you go along. That way, you can refer back to them later if you need to.
Overall, video tutorials can be a great way to learn how to make a dreamcatcher. They allow you to see the process in action and can be easier to follow than written instructions. Just make sure to choose a tutorial that is clear and easy to understand, and don’t be afraid to pause and rewind as needed.
Related:
How to Make a Dreamcatcher Without a Hoop: A Step-by-Step Guide
How to Make Dream Catchers with Paper Plates: A Step-by-Step Guide
How to Make a Dreamcatcher with Sticks: A Step-by-Step Guide